 Canada


How to Make Espresso
Updated for 2021. So, you’ve finally decided to join the espresso world. It might seem complex at first, with the many articles, videos, and products dedicated to enhancing one tiny little bean, but it really doesn’t have to be.
The first step into your new espresso and coffee journey starts right here, with our new 2020 Beginner’s Guide with details on how to make espresso. But first let’s introduce you to a few basic concepts and tips to help you get started.
It’s… a seed?
Yes! The coffee beans that are loved all around the world are actually the seed of a coffee cherry. Coffee cherries are grown and handpicked in over 50 countries, with Brazil and Vietnam being the most productive coffee growers, producing millions of pounds of coffee each year. After the seeds are picked, they are then washed to remove any excess bits of fruit and spread out to dry. This is what we call green coffee, unroasted beans that are just waiting to reach their full potential.
There are a lot of sub-categories for coffee roasts, but the baselines are simple enough to follow: green, light, medium, and dark. The amount of time a bean is roasted drastically changes its characteristics such as caffeine content and flavor.
If you find yourself enjoying coffee from popular chain brands, you’ve likely been drinking some dark roasts, which are fairly common in commercial and cafe settings. Whatever your preference, we urge you to try a good medium or light roast, as sometimes dark roasts are made specifically to cover-up a bean’s imperfections.
A lightly roasted coffee bean will still retain a lot of its original flavors and has the highest caffeine content, while a medium roast is a great combination of roasting and bean flavors. A medium roast will be sweeter than a dark roast, and steers clear of the bitter flavors associated with darker beans.
There are two major bean types, or cultivars: Coffea Arabica, known as Arabica, and Coffea Caneophora, which we call Robusta.

Arabica vs. Robusta Coffee Beans
The basics are simple to remember. Robusta is much easier to harvest and produce, but lacks flavor, making it the lesser of the two beans. Arabica beans are seen as a sign for quality beans and blends. While it doesn’t grow as well, Arabica is far and away the finer coffee with a range of delicious flavors.
The flavor notes of coffee beans typically depend on a variety of factors, which we could write a whole blog about alone. Instead, let’s just stick to some of the factors, which range from the beginning of the coffee’s growing cycle all the way until it is roasted, including the beans’: country of origin, altitude of growing location, washing process, and roasting process. Common flavor notes are chocolate, citrus, floral, and nutty, but there are far more complex flavors to discover.
What is Espresso?
We are about to blow your minds: it’s coffee.
Well, coffee brewed under pressure, to be specific. High pressure, high temperature water passes through a puck of finely ground coffee to extract the coffee’s complex flavors into the highly concentrated beverage that we lovingly call espresso. You can think of espresso as a recipe, which I'll get into a little further down. Espresso is a balance of all these variables that results in a drink that's far bolder and more flavorful than the average cup of coffee. Practice and patience are just two key ingredients to espresso's elaborate formula, but, most important of all, you must follow…

Temperature Surfing Your Way to Great Espresso
The Golden Rule of Espresso
The golden rule is to pour 2 ounces of espresso in a 25 second period. This is your extraction time. If the 2 oz. extracts in less time, then the grind is too coarse and needs to be adjusted to a finer grind size. If the espresso is flowing too slowly, then the grind needs to be made coarser. The closer you get to the correct shot time, the smaller the adjustment you should make to the grind size. This process is known as dialing in the grind, or just dialing in, and it will do your espresso a lot of good to get comfortable with it.

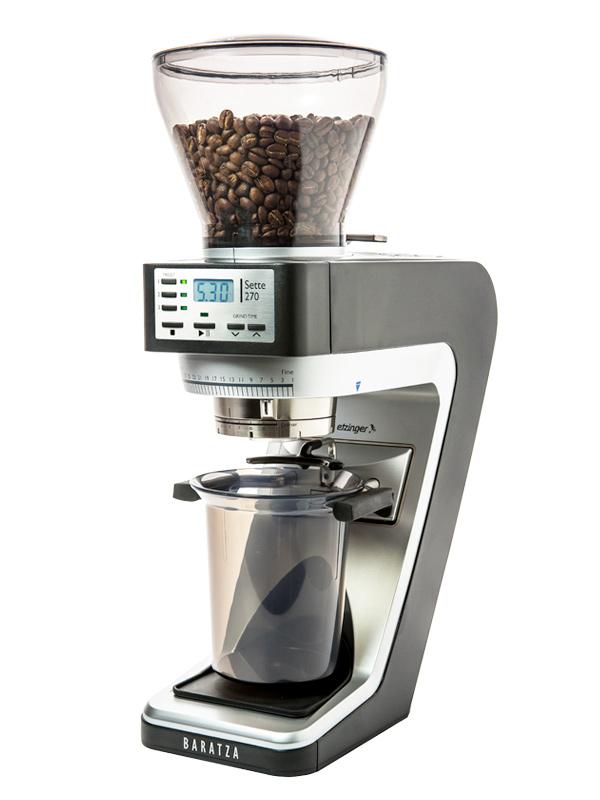
The Complete Guide to Coffee Grinders
You'll also want to pay attention to how much coffee you're dosing and how hard you tamp. For some basic tips to get you started, grind 18 g of coffee for a double shot of espresso, and apply a level tamp with about 30 lbs. of pressure. The tamp pressure is arguable, so do whatever is most comfortable for you, as long as you keep consistent with it.

How to Pull Consistent Espresso Shots
How to Make Espresso & Using the Right Espresso Machine
Often times, people mistake espresso as a specific type of coffee bean, which is totally untrue. Espresso is just a highly concentrated, pressurized brewing method to create a stronger, more potent coffee drink. While espresso can technically be made with any coffee beans, typically bags that are labeled as espresso blends are specifically designed to make better espresso. Roasters have the choice between using beans of a single origin or, more commonly, a blended roast of multiple growing locations and countries.
So, how do you do it? Well, making good espresso isn’t necessarily hard, but it does take practice and precision. Here are a few easy steps to get you started on the right foot:
The Steps:
- Select the right coffee
- Grind your beans
- Tamp
- Lock in portafilter
- Brew
Bean Selection
Selecting the right bean for the right beverage is the first step to pulling a great shot, and often overlooked. Since espresso extraction is a much more concentrated brewing method than other coffee brewing methods, the quality of the bean is very important. Simply put, if the beans being used are poor quality, then the resulting extraction will be just as poor. Just like any other form of cooking, using quality ingredients is imperative to success.

Best Coffee Beans for Super Automatic Espresso Machines
Using fresh beans, opened within the last two weeks, is crucial. Typically we suggest a light/medium roast that is dry and fresh for the most complex flavors.
Grind Setting & Dose
Grind size is one of the ways flavor is governed, and how the timing of the shot is controlled. When making espresso, the ideal grind size to start with will be a little finer than granulated sugar. You want a shot of about 2.5 oz in 25-30 seconds. If it comes out too quickly, adjust for a finer grind. Too slowly, and you can back out to a coarser setting. You'll start hitting the sweet spot once you notice the grounds clumping together. Once you grind your coffee into your portafilter, you can move onto tamping.

How to Clean a Coffee Grinder
Your dose is going to depend on whether you are making a single, double, or triple shot, as well as the type of brewing equipment you are working with. For instance, the suggested dose for a doubleshot is about 16-18 grams of coffee, depending on the portafilter basket size and your flavor preference.
When picking equipment, remember that a higher quality espresso machine will require a higher quality grinder. Espresso calls for a finer grind size than most brewing methods, so for best results you will want a grinder that has a high degree of consistency. A more uniform particle size will saturate the puck evenly and prevent channeling. In this case, a burr grinder is best.
A top-class espresso machine won’t pull amazing shots if the grinder is lower quality and the grind is imperfect. Burr grinders will be best for the consistent grind espresso needs. Beyond that, burr size and material, motor power and RPM, doser or doserless, and other factors should be considered for your needs.
$579.00
Tamping
Tamping is integral to making fine espresso and your next step. The purpose of tamping your grounds in the portafilter is to create a uniform surface through which brew water can flow evenly. When your grounds are in the portafilter basket, lightly shake the portafilter from side-to-side to evenly distribute the grounds, and level off by brushing your finger across the surface. When tamping, you want to apply a strong but measured amount of pressure to the grounds on a level surface for an even tamp.
Be sure not to over tamp or exert too much pressure on the puck of coffee or you can cause channeling. Channeling causes a channel or fracture to open in the puck through which all of your brew water will try to flow, making for a very uneven or poor extraction. Ideally, you also want your tamped grounds to be level so that water flows evenly throughout the puck. If tamped unevenly, water will flow to one side of the puck, resulting in an uneven extraction.
The amount of pressure applied when tamping is a matter of some debate, but it is generally agreed that it's most important to be consistent. You want to apply the same, or similar pressure when tamping every time so that when you need to make adjustments, you only need to pay attention to grind size.
Brew
Once you've tamped down your coffee, it's time to lock in the portafilter into the brew head. Once you've done so, begin brewing! As we mentioned above, you want to aim for about 25 seconds a brew time for your shot.
Helpful Things to Keep in Mind
Coffee Brewing Temperature
The Specialty Coffee Association states that the ideal brewing temperature ranges between 195 to 205, which should result in a shot that is around 160-165 degrees in the cup. Your drink should be hot to the touch, but it shouldn’t scald you.
For Heat Exchangers, you’ll want to perform a cooling flush if the machine has been on but not brewing for some time. You can do this by running brew water out of the group head for a few seconds to remove any overheated water from the system. Other prosumer equipment, especially those with PIDs or Dual Boilers, should have stable temperatures as long as the machine has fully heated up.

Temperature Stability On A Heat Exchanger Espresso Machine
Be sure to leave the portafilter locked in while the machines heats to make sure no heat is lost while brewing. Remember to preheat your cups with steam or hot water before pulling your shot to maintain a hot cup of java.
Brewing Equipment
The big choice. There’s a multitude of features and finishing touches to any given machine, but the simplest way to approach deciding which machine to purchase is to first consider the boiler type. You’ll find single boilers, heat exchangers, and dual boilers.
- Single Boiler Dual-Use
- Single Boiler Dual-Use espresso machines are the most basic semi-automatic models. These machines have a single boiler that is used for both brewing espresso and steaming milk. The small size and low cost provide an easy entry into home brewing. There are also higher end machines with single boilers that are equipped with PID temperature controllers. These machines are often purchased by people who are more interested in precise control over the temperature of their and may not be concerned about milk steaming.
- Heat Exchanger
- These espresso machines are some of the most commonly found machines in the Prosumer category. Designed with boilers that feature heat exchange technology they can brew and steam simultaneously by maintaining a constant supply of both steam and brew water. The basic concept is the brew water is in a small tube that is supplied with fresh water each time you hit the brew button or ever to brew. That tube goes into the boiler and the large mass of boiling water surrounding the tube heats the water as it passes through.
- Heat exchange machines are a great choice for developing brewing techniques. They offer better temperature stability, higher capacity, and professional grade components. Learning how to brew at consistent temperatures can be learned but is not what these machines are generally well known for, particularly when compared to a double boiler machine.

Dual boiler espresso machines offer the highest degree of temperature stability.
- Dual-Boiler
- Dual Boiler espresso machines are built with two boilers instead of one. Each boiler has its own dedicated application (brewing or steaming respectively) and in most cases the steam boiler can be switched off when not needed. Dual Boiler machines feature many of the same benefits and design features present in Heat Exchange models such as high capacity, water line adaptability, rotary pumps, E61 Groups, and the ability to brew and steam simultaneously. They are typically found on the most powerful machines available.
Using Milk in Espresso Beverages
Espresso is a powerful beverage with a strong flavor. A good shot of espresso can be a perfectly tasty drink all its own, but also makes for a great partner when paired with velvety steamed milk. That bold flavor of espresso is cut beautifully by the light sweetness of steamed and frothed milk, resulting in some great cafe-style specialties.
The most popular milk for frothing and steaming is whole milk because of its fat content and full flavor. However, the world of milk is looking cooler everyday with the options of soy, almond, cashew, coconut, pecan, rice, and pea milk. We even tested 10 different kinds of milks to see how they frothed, poured and tasted.
Frothing technique is an art form that should be seen and experienced rather than read. Check out our blog below for our 5 tips on milk frothing for beginners.

Milk Frothing for Beginners 5 Tips
We tried to just cover some of the basics here, but practicing making espresso can range from a regular, everyday practice to a full-fledged hobby. It’s all about the amount of time and energy you put into it. Check out our recommended reading section below for more blogs that go in-depth on how to make coffee, espresso, choosing the best espresso machine for you, making milk-based coffee beverages and more.